
Guide to Installing a Receptacle with USB Sockets
Just when your phone hits single-digit battery percentage, your charging blocks never seem to be where you need them. With a few USB outlets, you won’t have to play musical chairs with device chargers and standard outlets. Read on to learn how USB outlets work, their benefits, how to install a receptacle with USB sockets in your home, and when to call Express Electrical for assistance.
What Does a USB Outlet Do?
A USB outlet looks much like a standard outlet, but these receptacles feature built-in USB ports as well as the usual electrical sockets. These sockets let you plug a USB cable directly into the wall without an adapter. Therefore, the device is charged directly from the electrical circuit.
Benefits of USB Outlets
USB outlets offer several advantages, including:
- Convenience: Charge devices without adapters in various locations around your home, and charge multiple devices at one outlet.
- Compatibility: Accommodate a range of devices with a combination outlet that supports various connection types.
- Fast charging: Many USB outlets support fast charging, allowing for faster charging than standard sockets.
- Aesthetic appeal: Streamline your space with sleek USB outlets that minimize the need for multiple bulky chargers.
Choosing the Right USB Outlet
Just as there are numerous USB cable types, there are several types of USB outlets available to accommodate them. USB-A ports are the most common and connect to a broad range of devices, including device chargers and computers. USB Micro-B connectors and ports are standard for older phones and cameras. USB-C cables are versatile connectors that support fast charging and are gradually becoming the standard for most devices.
USB outlets come in different configurations to accommodate cables. Common options include:
- Standard USB outlet: Features one or more USB-A ports alongside standard electrical sockets.
- Combination USB outlet: Include two or more USB port types, usually USB-A and USB-C, for more versatile charging.
- Power delivery: Delivers high wattage compared to standard USB outlets, enabling faster charging for larger devices. They can adjust voltage and current dynamically as needed to protect against overheating and overcharging.
- Smart outlet: Feature built-in smart technology that allows you to remotely control or automate devices.
- Tamper-resistant receptacle with USB: Include safety features that prevent entry from foreign objects.
Safety considerations
Keep safety and electrical code compliance in mind when replacing an outlet with a USB outlet:
- Select a USB outlet listed by Underwriters Laboratories, which verifies safety testing.
- Don’t replace a ground fault circuit interrupter (GFCI) with a USB outlet, unless it’s on a GFCI circuit or equipped with approved GFCI protection.
- Check the wiring and circuit amperage compatibility — avoid replacing an outlet dedicated to high-amperage appliances.
- Some jurisdictions require upgrading to arc-fault protection when you replace an outlet, which requires a licensed electrician to complete.
Where Should I Put a USB Outlet?
Strategically installing a USB outlet helps optimize the convenience of its functions. Consider these locations:
- Entertainment centers: Create USB power and charging stations for TV remotes, gaming console controllers, and other entertainment devices.
- Nightstand: USB charger outlets next to your bed allow for convenient phone, smartwatch, tablet, and other charging overnight.
- Home office: Install USB outlets near your office area for easy charging access for laptops, phones, and other devices.
How to Install a USB Socket
Installing a USB outlet requires some electrical understanding but is otherwise a reasonable afternoon project for handy homeowners. Follow these steps to install your outlet, but don’t hesitate to call an electrician if you’re unsure about any stage.
Tools & materials needed
Before starting the installation, gather the necessary equipment and materials. These include:
- Voltage tester
- Flathead screwdriver
- Needle-nose pliers
- Phillips screwdriver
- Wire stripper/cutter
- Electrical tape
- Outlet wall plate
- USB wall outlet
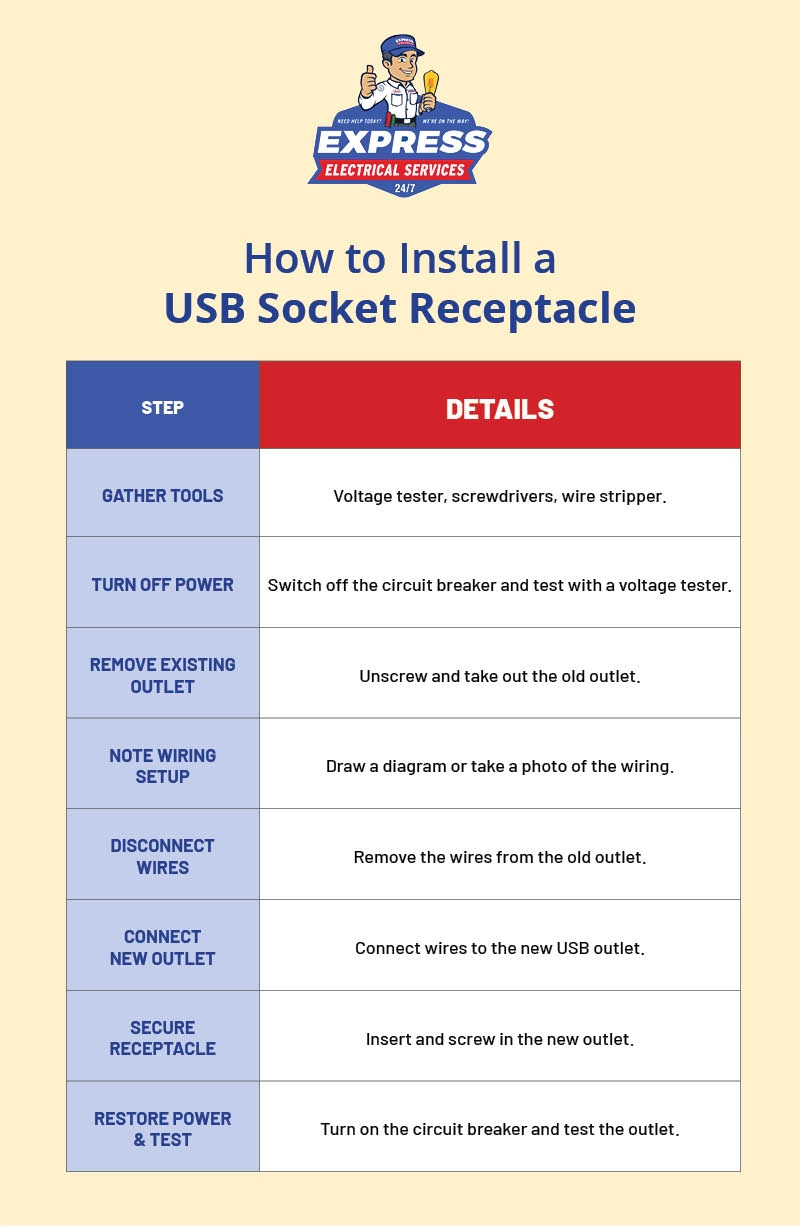
1. Disconnect power
Turn off the circuit breaker connected to the existing outlet at your electrical panel. If the breaker panel isn’t properly labeled, shut off one switch at a time until you find the right one. You can also turn off all the electricity using the main breaker to be on the safe side. Tape the switch to the off position to ensure someone doesn’t mistakenly switch it on before you’re ready. Use a voltage tester at the outlet to make sure the power is off.
2. Remove the existing outlet
Use a flathead screwdriver to remove the cover plate and a Phillips head screwdriver to remove the top and bottom screws holding the outlet to the wall.
3. Note the wiring setup
For later reference, draw a diagram, take a picture, or label the wires of the existing wiring setup. You should be able to identify these wire types:
- White: Neutral wires that transfer unused electricity to the panel.
- Black: Hot wires that feed power to the outlet.
- Copper or green: Ground wires that neutralize currents.
4. Disconnect the wires
Remove the screws holding the wires in, or release clamps by pressing the release button or using a screwdriver or small tool. Straighten the wires with needle-nose pliers.
5. Connect the wires to the USB outlet
Following the new receptacle’s instructions, install each wire in its correct position. Some models have color-coded terminal screws that match with specific wires. Connecting the ground wire first can make it easier to position the device and connect other wires. Your reference diagram or photo can be useful here too.
6. Secure the receptacle
With the wires secure, insert the receptacle in the wall box. Shorten or adjust the wires if needed. Secure the outlet to the wall with the Phillips head screws. Don’t over-tighten the connection, but ensure the receptacle is secure. Use a screwdriver to reattach the cover plate.
7. Restore power and test
Switch the circuit breaker back on, and use a voltage tester to verify the outlet is receiving power and functioning properly. Plug in a USB device — if the output is installed correctly, your device should start charging. Some outlets feature an LED light that shows charging is in progress.
Contact Express Electrical Services for USB Socket Installation
Customers in Southern California choose Express Electrical for all types of electrical installation. If you’re ready to upgrade your home’s convenience, we can assist with installing USB outlets and other equipment. Licensed and experienced, our technicians deliver quality workmanship with each installation. Contact us or book online to schedule a USB outlet installation.
Frequently Asked Questions
What should I do if my USB outlet stops working?
If your USB outlet stops working, ensure the circuit breaker hasn’t tripped and is switched on. If it’s GFCI-equipped, test and reset. Look for scorching, cracks, or other signs of damage, and call an electrician for assistance with repair or replacement.
Can I install a USB outlet myself, or do I need to hire an electrician?
With basic electrical knowledge, installing a USB outlet is a reasonable DIY task. Hire an electrician if you’re inexperienced with replacing outlets or if the installation has added complexity, such as code compliance requirements or damaged wiring.